Showing posts with label chandelier. Show all posts

Sunday, July 3, 2011

Lacking illumination is not always bad

Hey, look I found another free chandelier.
Pretty ugly eh?  Then again if it was pretty it wouldn't of been abandoned.
So what do you think it will become?  I've done 3 chandeliers, black and white, gold french, and green daisy (outside).  I have no need for another one at this moment.
But I have seen a few different ideas out there in blogland and think I'm going to try something I've seen modified.  Follow along, it's seems kinda simple.
Start with chandelier and remove all the wires.  You'll need wire cutters and a wrench. 
Just take the parts off and undo everything you find.
I unscrewed the light cups to pull the wires out. 
Then I realized I could unscrew the little bottom finials instead.
Oh well 
So ya got rid of all the wires, now what?
Put it all back together.  I did leave the little bottom finials off. 
Then bring it outside and give it a coat of primer.
Have a clue yet what's it gonna be? 
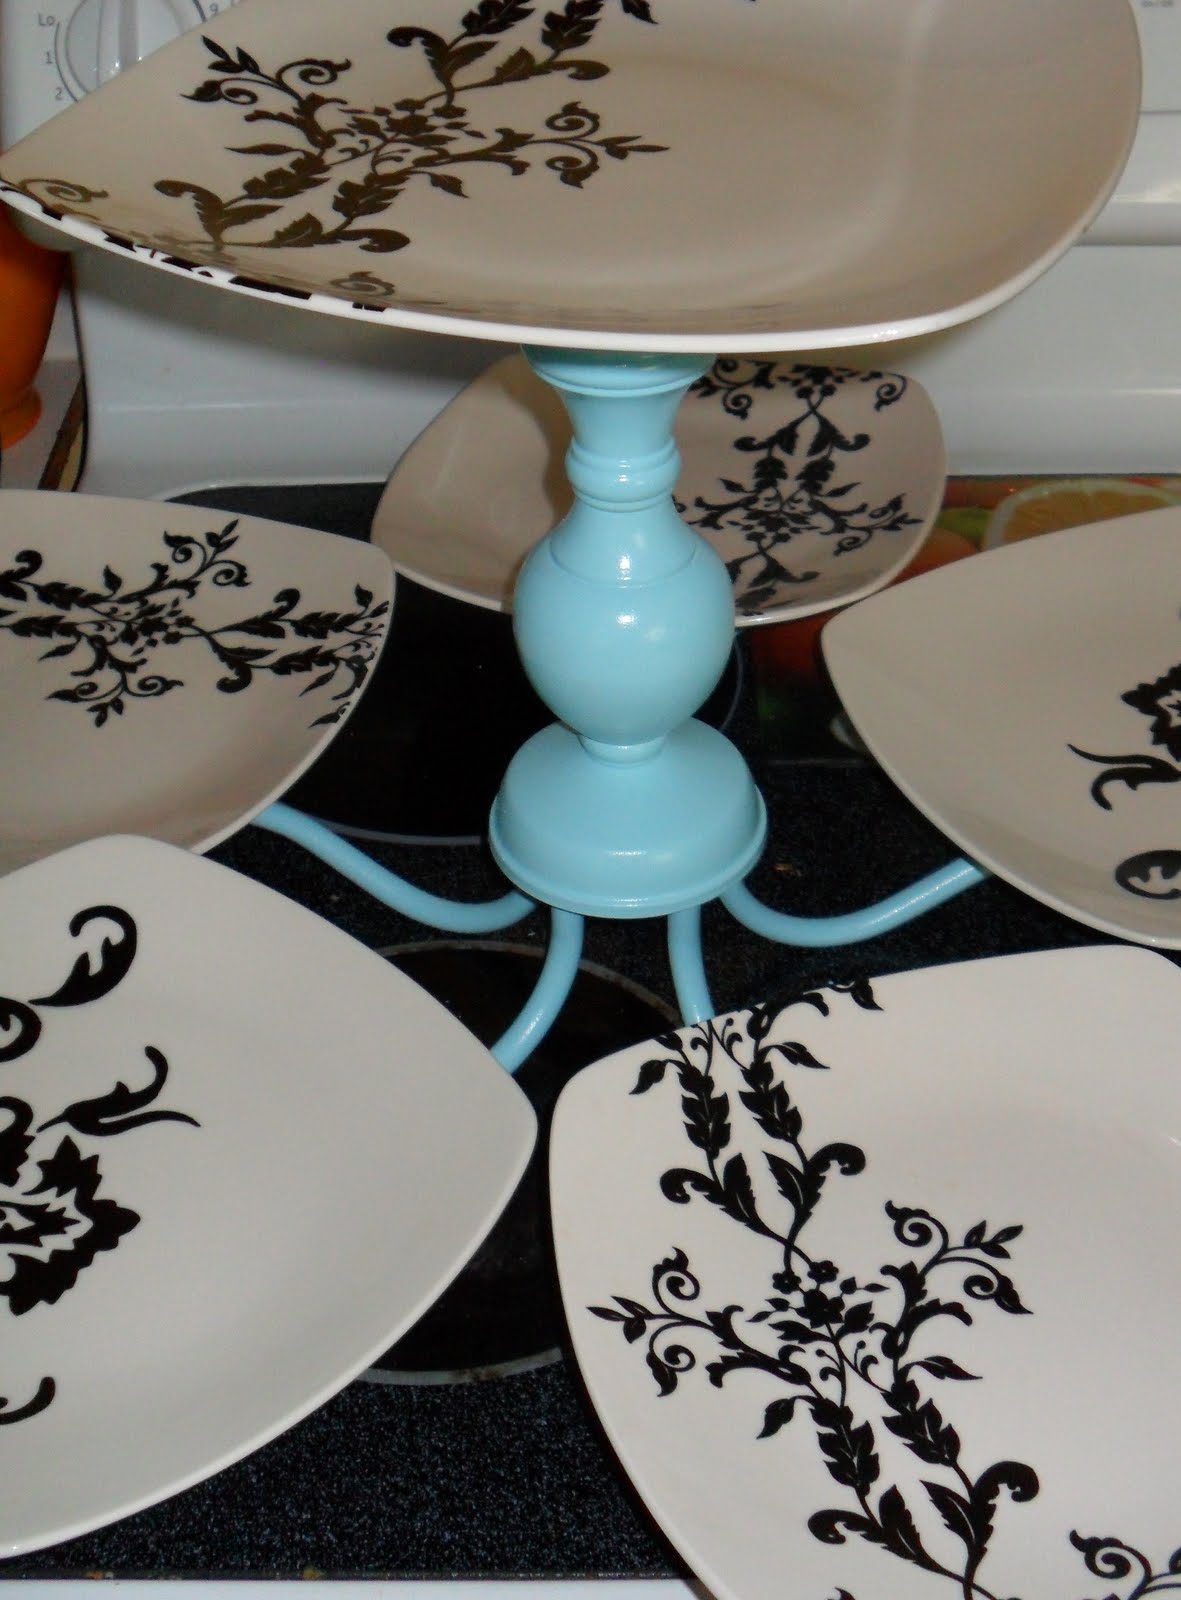
How about now?  It's a multiply server!
I found this vintage dishes for a quarter a piece.
I was going to keep it white but then I found this color spray paint. 
Looooove the blue, sigh, it's soooo pretty. 
The ones I saw in blogland were permanent with holes and stuff.  I didn't want to do that and the cups were big enough to be stable and a quick add on for the top.  (It's the brass plate thingy that mounts to the ceiling) 
Now I can add a bigger plate and it will be stable plus I can take them off to be washed. 
The best part about it is, I can also store it easier without breaking the plates with the added benefit of switching out dishes. 
Or throw a bowl on the top instead. 
I suppose I could put a teapot on top with teacups and saucers on there as well.
That might be really cute!..... maybe I should do another one and have a tea party.
All in all this cost about 1.50 for the plates and 3 dollars for spray paint.
Plus, if I still wanted to I could put tea lights in there as well, just have to trade out top for painted finial.
Yep, I like it!!!!... now to find an excuse to use it :)
Tea party anyone?
OH yeah  TAAAAAA-DAAAAAA!!!

Saturday, January 15, 2011

Chandi redoux part one

A friend of my daughters, who is quite impassioned with all things French, came to the house, a while back.  Found out I had remade the chandelier in my daughter's room and, my daughter who is generous enough to volunteer my time, planned a project for me.
I was to make her a smaller one, with antique french features.  It needed to be gold.
It's soooooooo much easier to do white, or black, or red, or hot pink.  Oooooh hot pink sounds like fun.
Off to the ReStore to hopefully find something cheap.  I found this for 2 dollars.

Yeah, I know it's not tooo pretty but, that is why it was only 2 dollars.  The fact it was dirty was why they gave me a huge discount.

So after I removed the outer glass thingy, I had this simple and small chandi with horrible lights.  Good thing the lights are the easiest part. 
I had been hunting for crystals to hang but those things are like a dollar a piece (cheapest I could find)
I was at the ReStor again and happened upon these for like a dollar!!!!  They are plastic but at this point who cares. 
I do cruise the ReStore often looking for freebies.  Things that are chipped or missing pieces.  Then I take them apart and use the pieces.  This is my stash, I'm going to use the chain for the added support, since I am converting this to plug in and not hard wire. 
Hard wire, rewire, convert?!?!?!! sounds too complicated?  Nah, it really isn't.  They sell the kits for less than ten bucks.  Once you're use to it, then you can just buy what you need.  So you unscrew the top and you will find the gold wire  (two parts) is attached to a bunch of other wires.  Don't worry we are only switching the gold wire for another wire.  The other stuff stays the same.  So unwrap the electric tape and unscrew the wire nuts (the orange cappy things).  Untwist the wires to get the gold wire out or the wire that is sticking out of the top of light fixture. 
There are two main colors black and white.  NEVER mix the two.
See the little gold wire?  That's the one we are removing. 
Ok, I have misplaced my replacement wire so until I form a search and rescue team to get my back in case I get lost in my mess of an art center.  I have moved on to painting.  Screw the top back on and proceed to paint.  There is this stuff that you can buff on metal to change it's color, it's called Rub'n Buff.  I had planned on using it to get the gold look I was after but then I was rummaging in my supplies and found this.

Not even sure where I got it, but it's like powdered gold.  Then when added to gold paint you get this.
It looked like real liquid gold.  I was excited. 
I brushed it on, one coat at a time and was tickled with the results.  I then sprayed a thin coat of lacquer over it a few times. 
So much better than the brass.  Oh I did take some steel wool and sanded the shine off a bit but, be careful if you sand too much, you start making it shiny again.  So sand enough to rough it up, so the paint can stick to it.
I let it dry for a few days to really set.  Then I got sick :( booo........ so this is a part one.

Hopefully by next week I will have this completed.  This will be my fifth rewire, remix light fixture and it just keeps getting easier.  Got something butt ugly? I say make it beautiful or just plain fun.
These are my other transformations if ya wanna check it out.http://craftingoccurs.blogspot.com/2009/09/back-to-school-paris-style.html