Wednesday, October 26, 2011

Grinchy Goodness

It's getting around that time again.  You know the most wonderful time of the year?
I am planning on doing a "Grinch found Christmas" theme.
Since I have many ideas I am starting now.  Right now, this very minute, as we speak.
I painted these light bulbs green.  They were burned out and I have been replacing them with energy efficient ones.  Then I put them in a box and forgot about them.
See the trend?  So now that I can find my stuff, I found them again.
So now they are painted a grinchy green  I pulled out my paint pens and had at it. 
One grinchy bulb 
Ten grinchy bulbs!

Ok, now to dig out my felt and whip up a simple hat. 
Tada...but he just looks like a troll.  On to pom-pom pillaging. 
But first more pictures! 
I'd watch out for the one in the middle, he's up to something. 
There, a little pom-pom and some fur lining and BAM!!  Grinchy Goodness!!!
Now all they need is a hook and a tree.

Friday, October 21, 2011

What's a "T" reef?

Ok, so I was on Pinterest and saw this amazing idea.  When I clicked on it for details I ended up on a rabbit trail.  Click after click and still no directions and then finally I had success!!
Yet they were far more organized than I want to be or am capable of.
After cleaning out my craft room I had realized I have been keeping the pizza cardboard.  Why?  I have no earthly idea.   Then it clicked!  Round, wreaths are round and a friend of mine loves tea.
Eureka!!!!  Craft inspiration coming into view.

So I glued two of the boards together to strengthen.  I used wood glue because wood glue is awesome on cardboard. 
While that is drying I found some paper that went well together.
Also in colors I know she would like. 
Plus it's got a "fally" feel to it.

The third pizza round is cut out like a wreath.
Oh you will need some clothes pins but they are sooo cheap. 
I used wood glue on the clothes pins as well.
Wood glue dries pretty quick and really makes a tight bond. 
So this is the wreath after I covered it in paper.
Make small cuts all the way around to fold them onto the back.  For the middle cut an X then continue to make smaller cuts so they look like pie wedges and fold them to the back and glue. 
Don't forget to cut a round piece of paper to glue on the back.
I also glued a braided ribbon around the edge to hide all my sloppy work. 
Also glue on strips of paper to the clothes pins...I guess you could paint then but I opted out.
Arrange your clothes pins where you want them and then glue down. 
Yeah, I coordinated the color of the tea.  I like tea but I love coffee.
My friend likes it.  The reason for having one is so when people come over they know what kind of tea is available.
I asked my daughter to run to the craft room to get the tea wreath.  She ran off and time ticked on.  I thought to myself, " hmmmmm I wonder if she knows what I meant"  I hear her come back up.  "Mom, what's a T reef?"  I went back down and showed her what I had made.  She said it was cool, and what was it.  I explained the concept and what I was trying to do.  That is when it hit, this was the "tea wreath"!!!
She burst into laughter as she explained what imagery was in her head.  Now I want to make a T that looks like a reef.


Wednesday, October 19, 2011

What's new pussy cat? wahhh wahhh wahhh

This is Roooooooo
She is our new edition to the family.
My mom has also moved in with us.  I would post a pic of her as well but haven't done that yet.
Rooooo came by her name for her love of being with my daughter and various hidey holes that her sweatshirt holds.  Riding around in her hood is her favorite.
This was the investigation of possible spot....the sleeve
"Sleeve Kitteh" here to snatch yo food ninja style.
So with much antics of the new kitten and busy schedule with mom, I haven't been as active in my "new" craft room as I had hoped.

Buuuuut have manged a couple of things.
Like this small revamp.
Don't look behind the curtain!!
Ok, see those boring 2x4's I didn't get to paint?  What? Can't see them?
Yeah, they do blend into the yellow fabric, don't they?

So I painted them grey.
I was not thrilled :/

So I tried a stencil
Ok a little better but what about a little white in there.

Ok, getting better but it really was still missing something.
I searched frantically for inspiration....
I found this in the free bin a while back, loved the cover and am going to use it for something.
But this insides were up for grabs.  At this point it may seem I just undid everything I done do. hahaha did ya get that?  I glued the pages on in random places.
Waited for it to dry and then ripped it off!

This is what I had remaining.
What do you think?
It's kinda got a hip-cool vibe to it.
So give me an opinion.  What do you really think?  Is it really cool or just crap?
I am not afraid of honesty :)

Thursday, October 6, 2011

Craft Center Finale a.k.a Amazing Transformation!!

Whew! I am finished!!!!
So lets take a glimpse of what I had going on and what I had to work with.
Exposed rafters with creepy spiders, dead and alive.  Big ole pile of stuff.
It was like wandering around in my mind.  Scary stuff!! 
Although in my mind all of this makes sense.  Really it does.

So my first attempt was clearing out a spot and faking a desk.
Core door on a pair of filing cabinet drawers.  Cost? nothing but freeing up space in my garage.  It was a win win kinda thing. 
Ok so that is what it was.  For many years that's what it was.  I am not very good at organization unless I have a giant plan.  Hence my giant plan reveal!!  Muahahahahah feels like thunder should clash right now.
Ok enough of my meanderings on the the transformation.
HUGE DRUM ROLL..........

TAAAAA-DAAAAAAAAA!!!! 
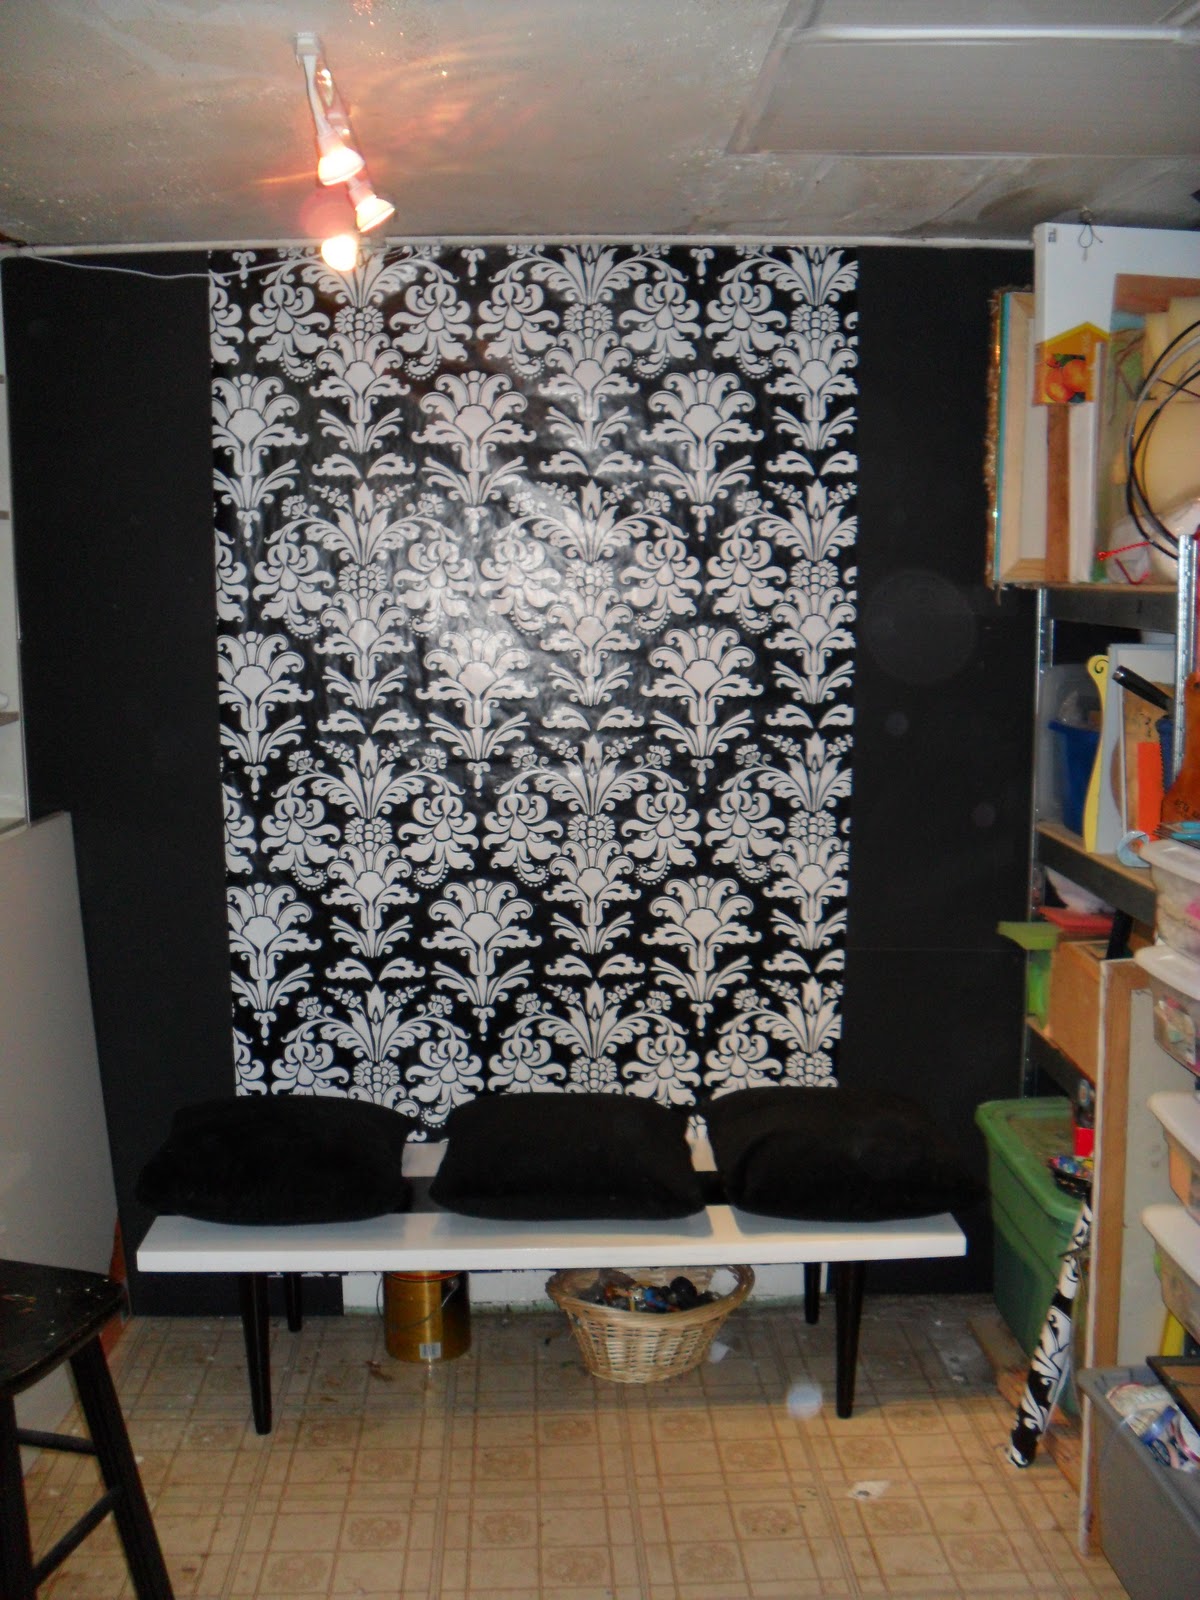
This is my 3 dollar wall transformation which consist of dollar store black card stock and left over Christmas wrapping paper.  Coffee table turned bench 10 dollars.
As you can see to the right my shelving was still pretty crappy. 
Luckily I already had a bunch of fabric and a few 2x4's 
The cheap fix for the exposed creepy rafters was dollar store foam board and staple gun.
The rug was 11 dollars, so I got two. 

Dollar store hamper bins for my long stuff.
And all my paint and glue on the shelves plus other stuff.
Oh, also I did no painting what so ever.
It's all dollar tree poster board.  I'm kinda excited about that. 
hey look more pictures :) 

Still more pictures... 

Oh, back to the desk area. 
I can see all my stuff that I need, when I need it.
It's not as pretty as my inspiration but it sure is prettier than it was. 
Although my ruffle is a fail, I'm too dang lazy to fix it.
The painting on the left, my husband painted (first ever) me as a flower and I painted him as well. Yes, he is a bee of course. After the painting was finished he made me play his drums. 
This is an old chip rack I found a while back.  I like it, it holds stuff. 
This fun looking cup is hand painted by me and designed by my daughter. 
This painting of the green apple was done by my son when he was 10.  He doesn't paint any more.  But I have this :) and it makes me happy. 
So, that is my art center!  Thank you for coming on the tour.  I hope you liked it, because I love it!!
You will now find me hiding down there quite often.
I think the cost total for all of it was 40 dollars.
Maybe 50, it's just easier to work with what you got and what people throw away.